My main concern was to find how to have the entrance join the ground level... by drawing...

or working on pictures...


Or just trying to put things together...

 Second stage : Making the cliff :
I ve made a big crate with strong plates of wood as it was to be under
the "first" mine which was already heavy. And I "closed" it s face with
bands of foam, like for the original Mine.

Placing the bridge to know how it s going to be and to...

add more foam "around" it so it looks more as partly sculpted in the
mountain. Here you also have a good vision of the many stalagtites that
i ve put under the ramp (to have it looks very old).


The uper part of the new cliff partly cover the original Mine's base to have the 2 parts work well together.
 Third stage : Painting the cliff :
Actually, I also painted the original Mine again a bit to have eveything work together.

 Fourth stage : Making the terrain :
The worst part of all this work : Making a ton of stupid and totally not interresting but sadly necessary hexagons !
I ve already used the technic I m going to describe on the first plate...

I first put a mat with hexagons on the plate :

Then I put headless nails at all the hexagons's corners

Then I carefully remove the mat, letting the nails in place (here s the reason of the "headless" nails)


When the mat is totally taken of, you can see that 50% of the boring job is done.
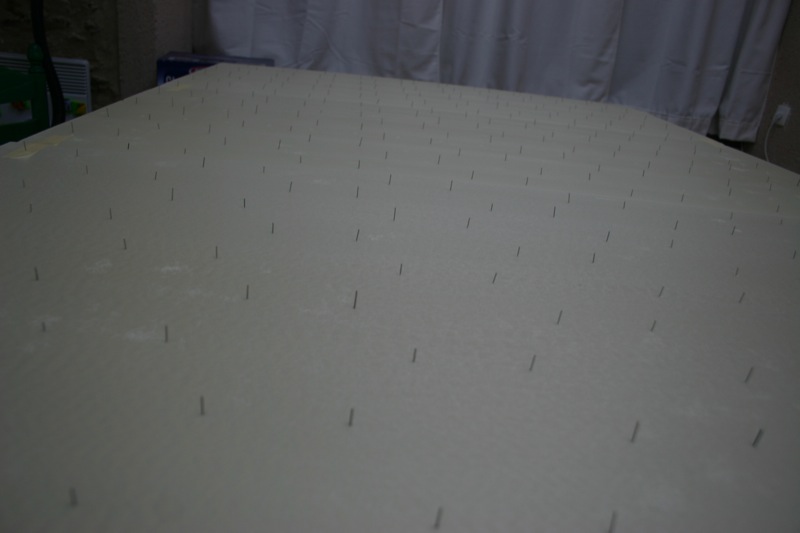

I then just use a melter and a metal rule : dont do it at home unless
you ve made long philosophy studies like I did in Faculty or you may
hurt yourself !

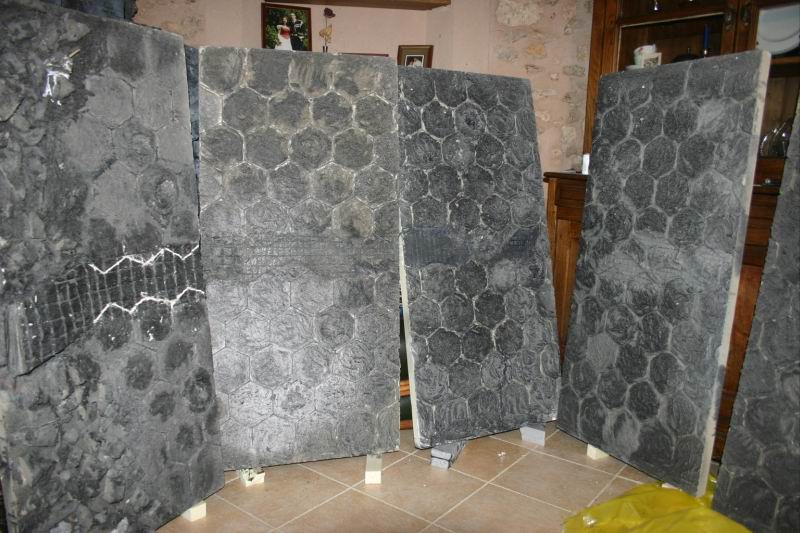
 Fifth stage : Texturing the terrain :
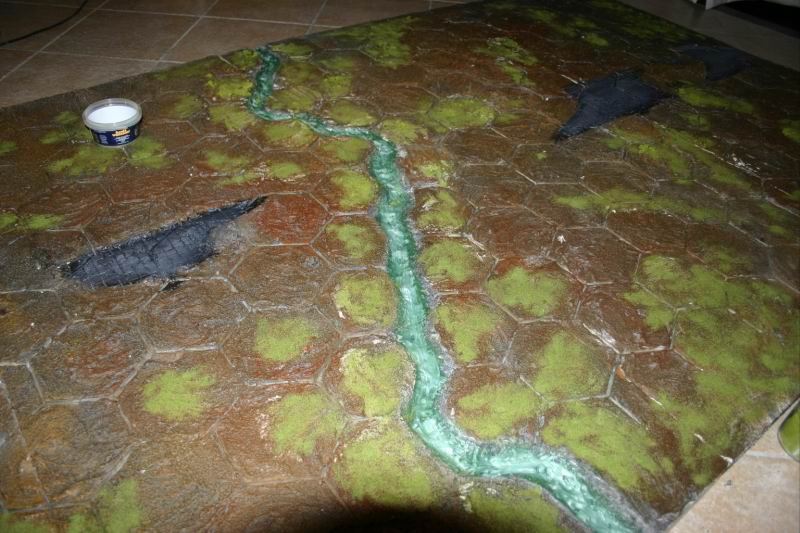
First step : drawing a road, making the river and a few holes
(meant to be craters from the Mine's canons : they give the maximum
range of the canons)

7 plates, each plate is 120cm x 60. Total : 1.20 m x 4.20 m without the mine (5m total with the mine).

Second step : texturing with sand mixed with plaster and white glue.


Here : the plate that is going at the bottom of the mine, with more craters and pieces of rock from the cliff.
 Sixth stage : Basecoating the terrain :
A simple basecoat, made of PVA glue, black paint and water. The pictures let you see the texture made in the previous stage.


Seventh stage : Painting and flocking the terrain.
Just base painting, dry brushing, flocking various stuff, amonst which mixed used tea powder...


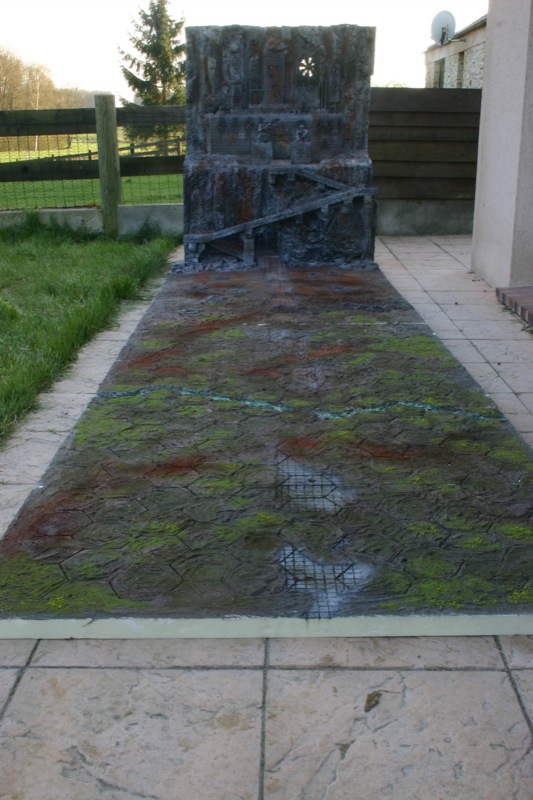
 Finally (with some more pigment powder on the mine and terrain) :